Back on the Road: 280z Alternator Upgrade

A very common issue with the Datsun 280z is the alternator’s external voltage regulator. The voltage regulator on the 280z is mechanical and very prone to failure. Now a days, alternators are internally regulated, and have a very long lifespan. Here, i’ll detail how to upgrade that alternator in the 280z, and wrap up why my car died in the middle of the freeway.

IMG_8311-0

What you’ll need:
– 12mm and 13mm socket (or maybe even 14mm depending on the bolts you have)
– 1983 Nissan / Datsun 280zx alternator (from Amazon BBB 14592, or O’Reilly’s Ultima #14592)
– wire cutter

What you’re doing:
We’re replacing the old 280z externally regulated alternator with a newer, internally regulated alternator designed for a 1983 280zx (it’s available and off the shelf).

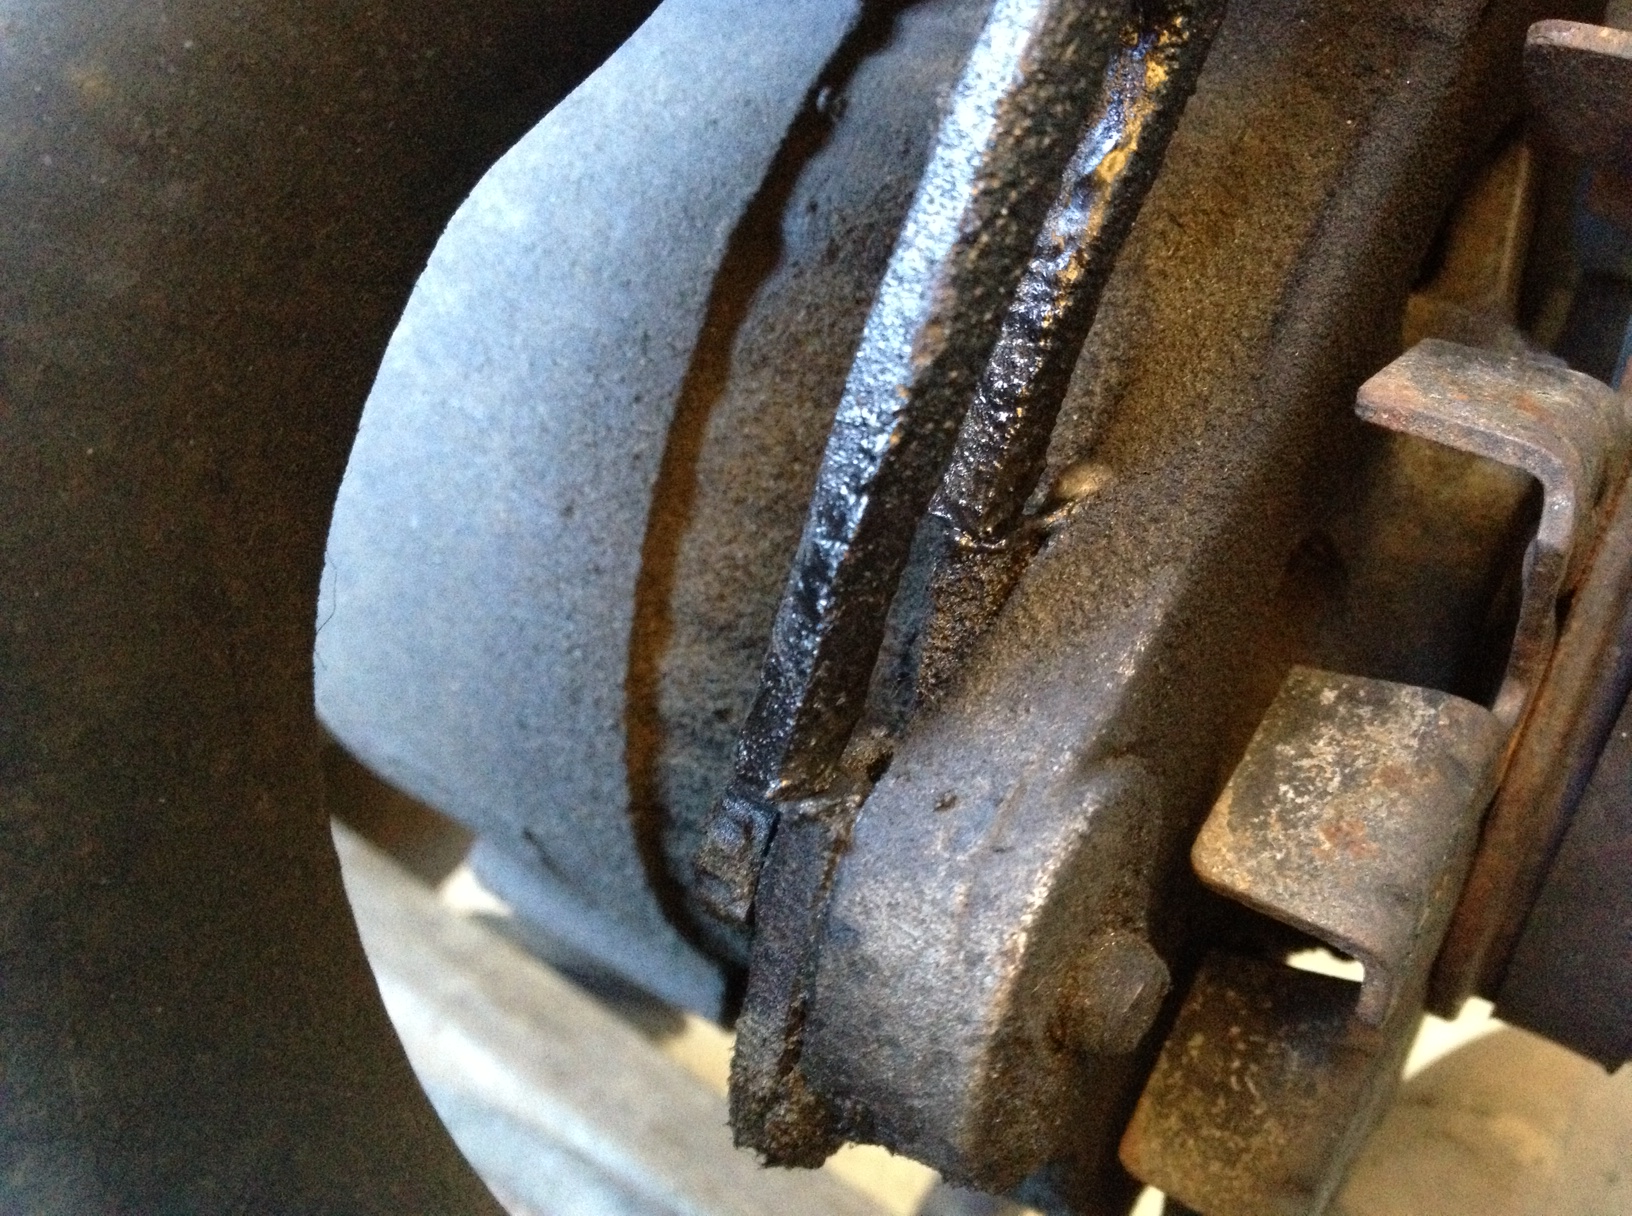
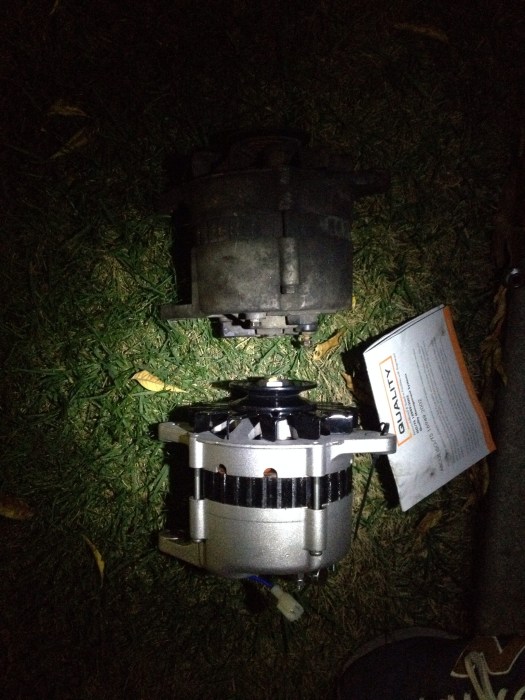
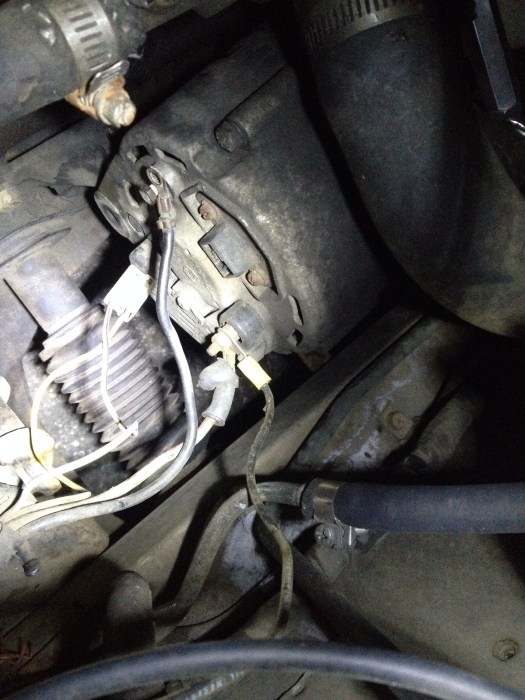
See below: old and new alternators. I honestly don’t know if mine was original because several sites mention the OEM 280z alternator had smaller fans. In my case, they were pretty much the same. Mind the images..I was doing necessary repairs at 11pm. hooray.

IMG_8316.JPG

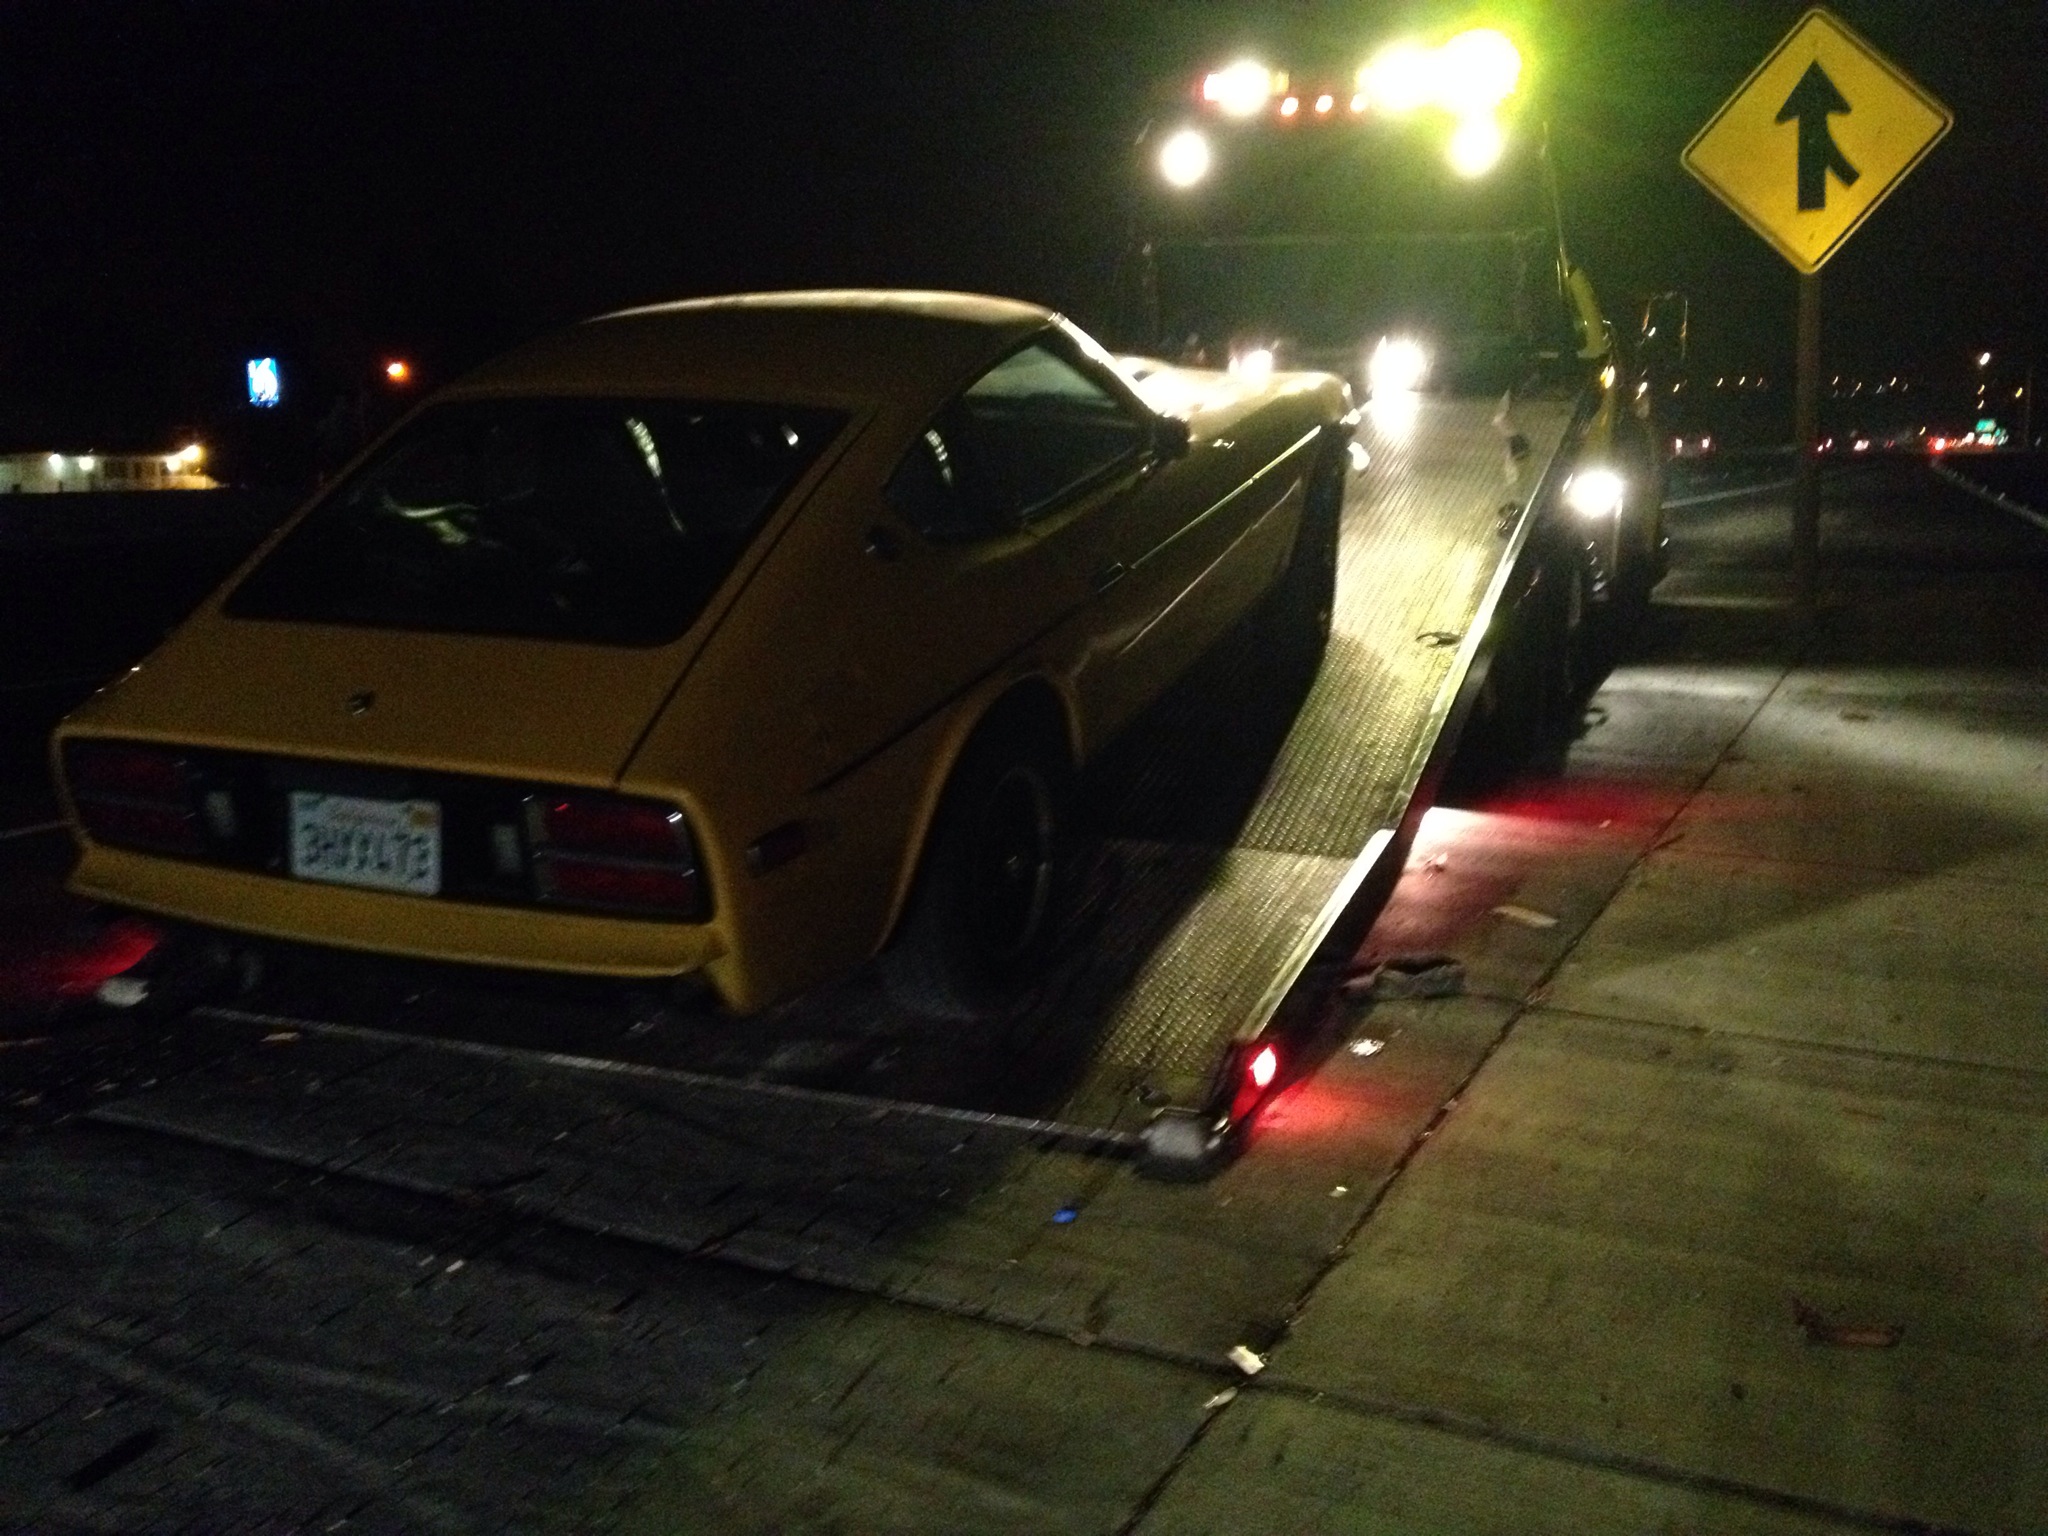
So why did my Datsun 280z die in the middle of the road? Why did the lights go dimmer and dimmer before then? Why was the engine running rough and eventually sputtering, choking to silence? Well, the alternator wasn’t doing it’s job – it wasn’t providing power to the system, so it was relying on battery power. And just like a toy car, when the battery starts to run out, all sorts of things happen. Lights go dim because there isn’t enough power. Engine acts up because there isn’t enough power to ignite the spark plugs. Ah! So regardless of whether it’s the regulator or the alternator, we’re doing the full upgrade, never having to worry about a failure in a mechanical switch.

You can get a 1983 280zx alternator from your local parts store fairly readily. I got mine from O’Reilly’s Autoparts for $46.00 – Ultima #14592. Equivalents are: BBB Industries 14592 and Premier Gear PG-14592.

1) Detach power – remove cables from the battery, so there’s no power to the system

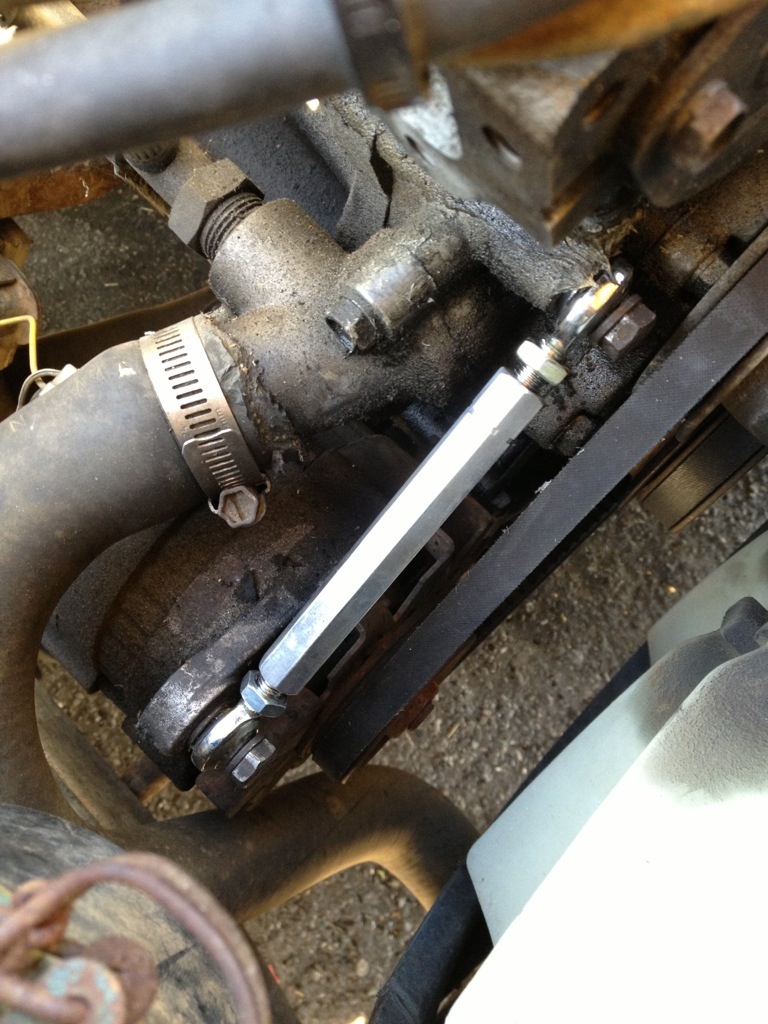
2) Remove the wires from the old 280z alternator and remove the alternator itself using the 13mm socket wrench. It may help to take a picture of the alternator just prior to removing the wires.

IMG_8315.JPG

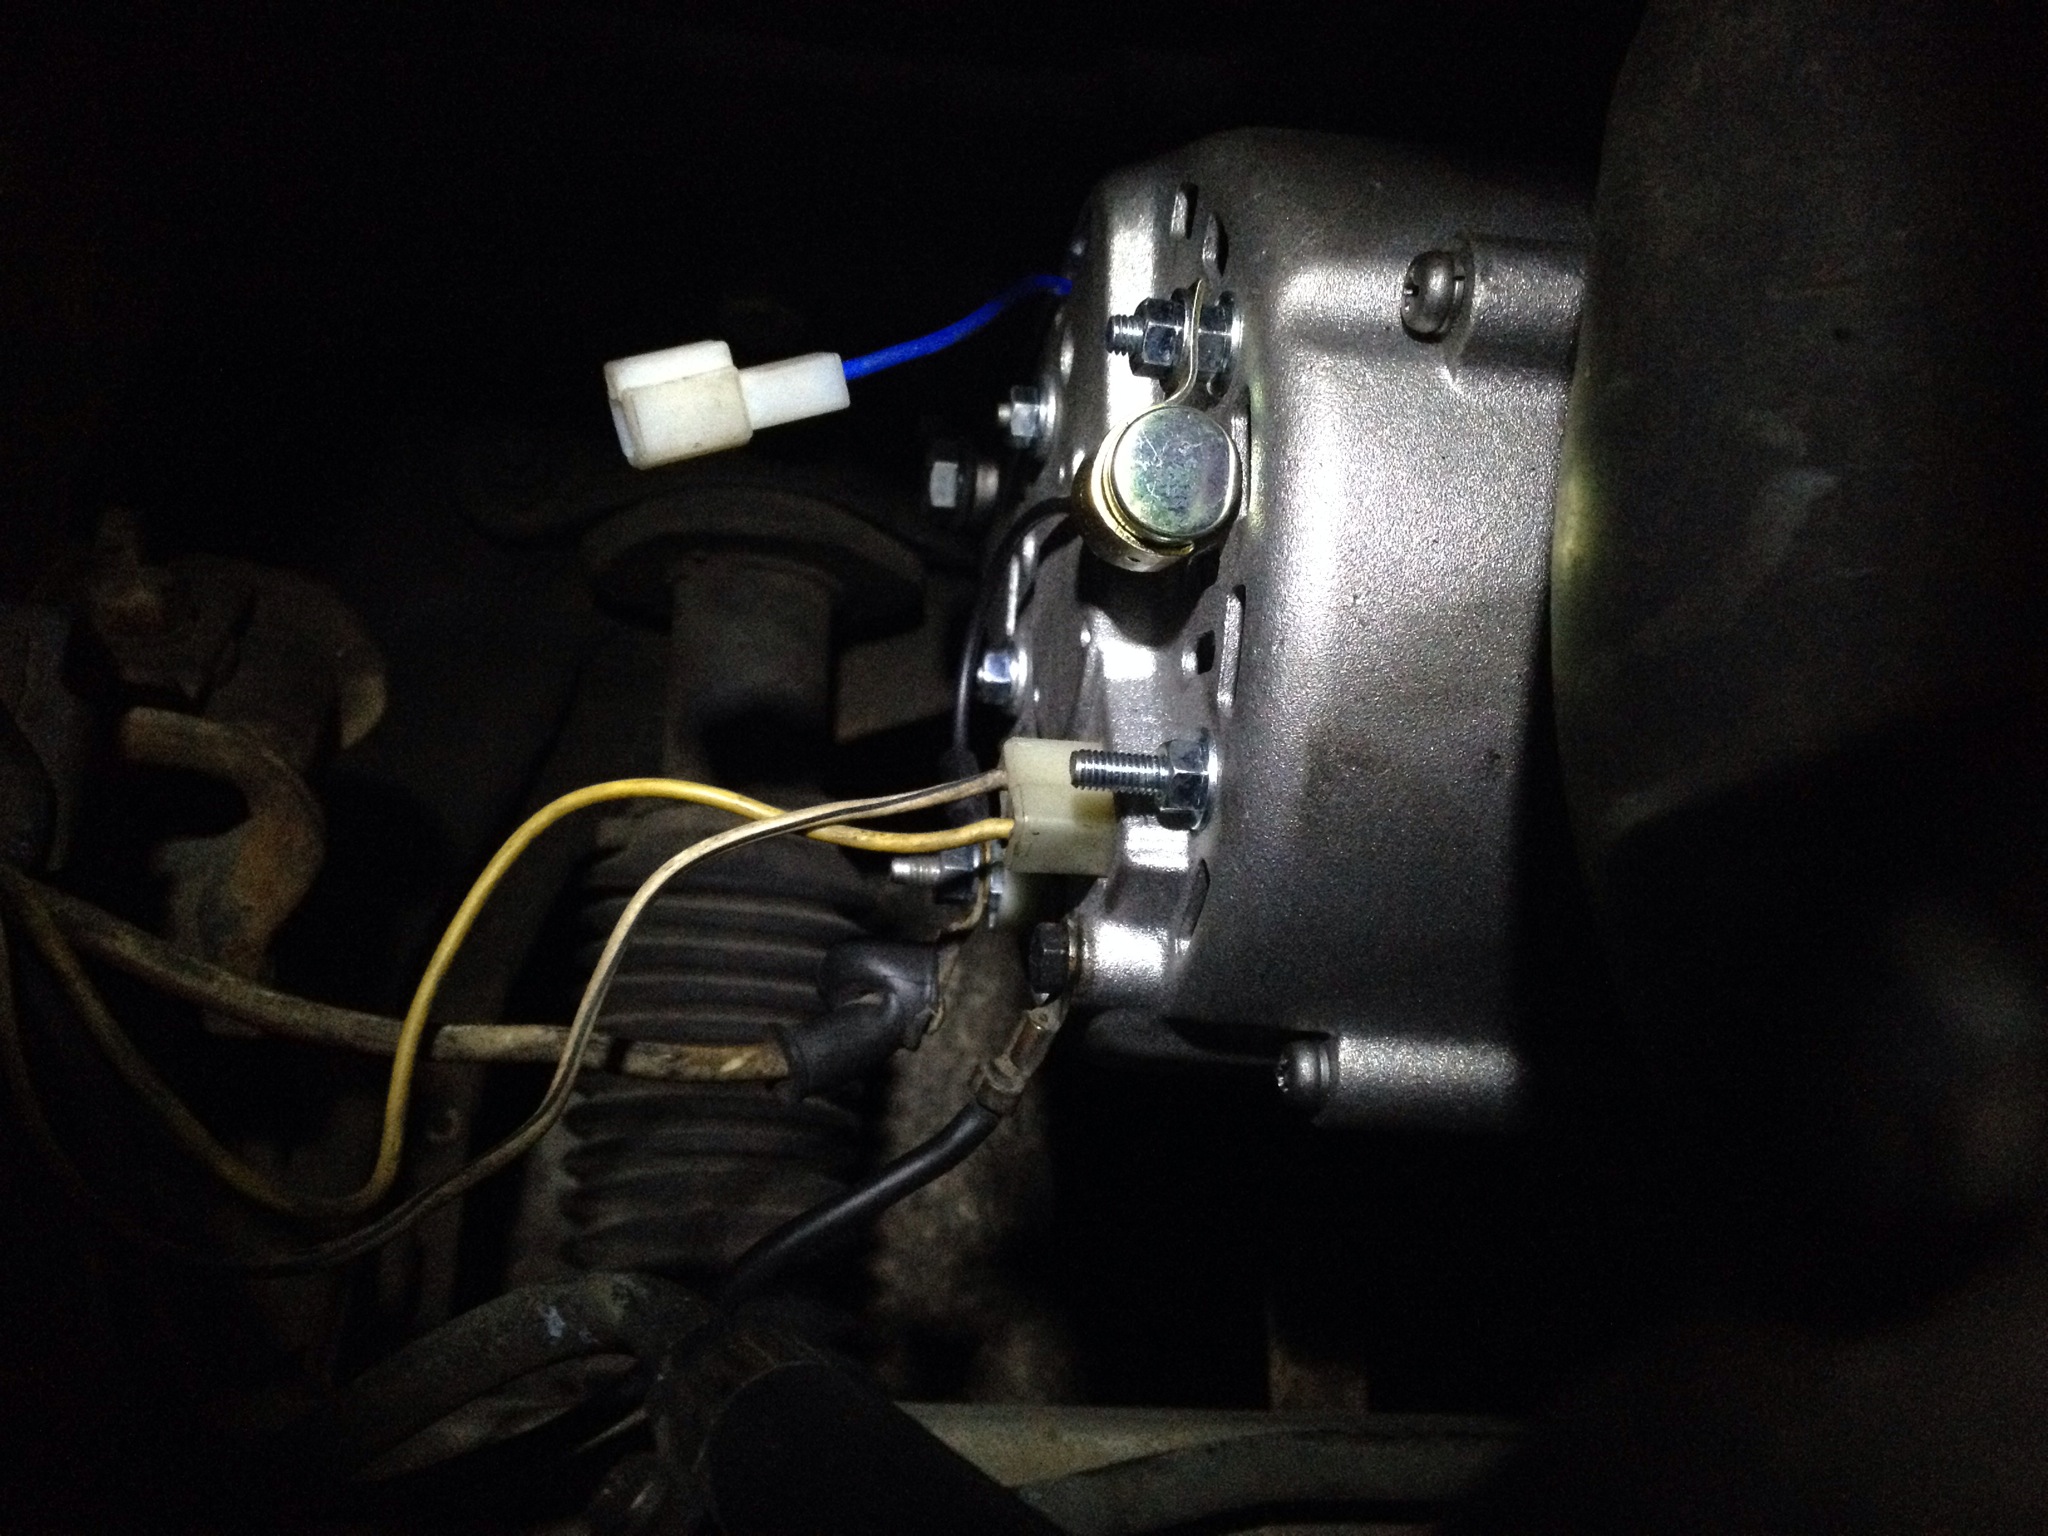
3) Install the new alternator, and reattach all wires

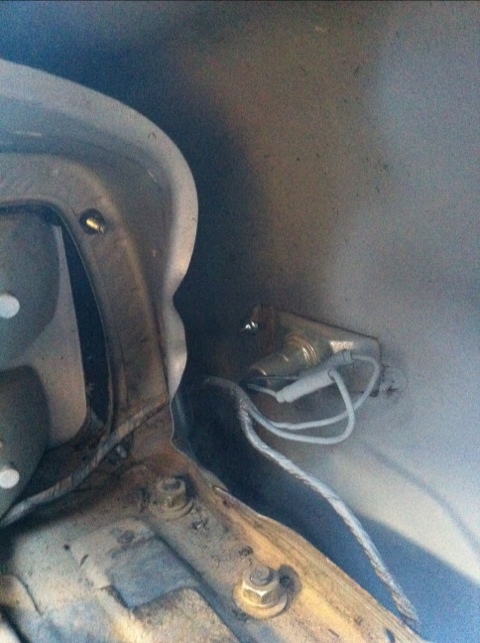
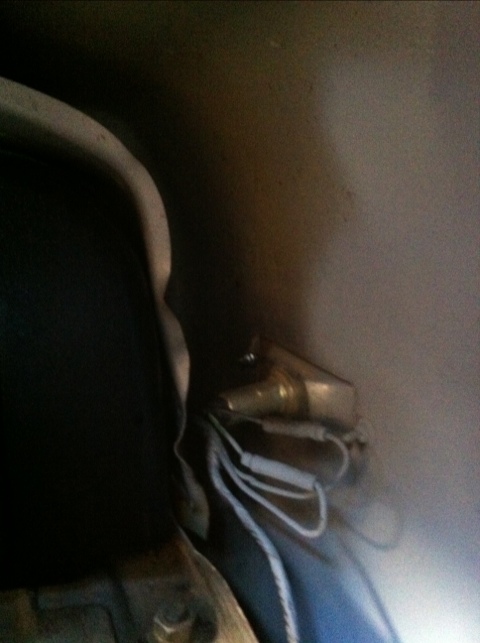
4) Locate the voltage regulator, which is just behind the metal plate that the wire fuses are mounted to. Un-attach the 6-wire connector.

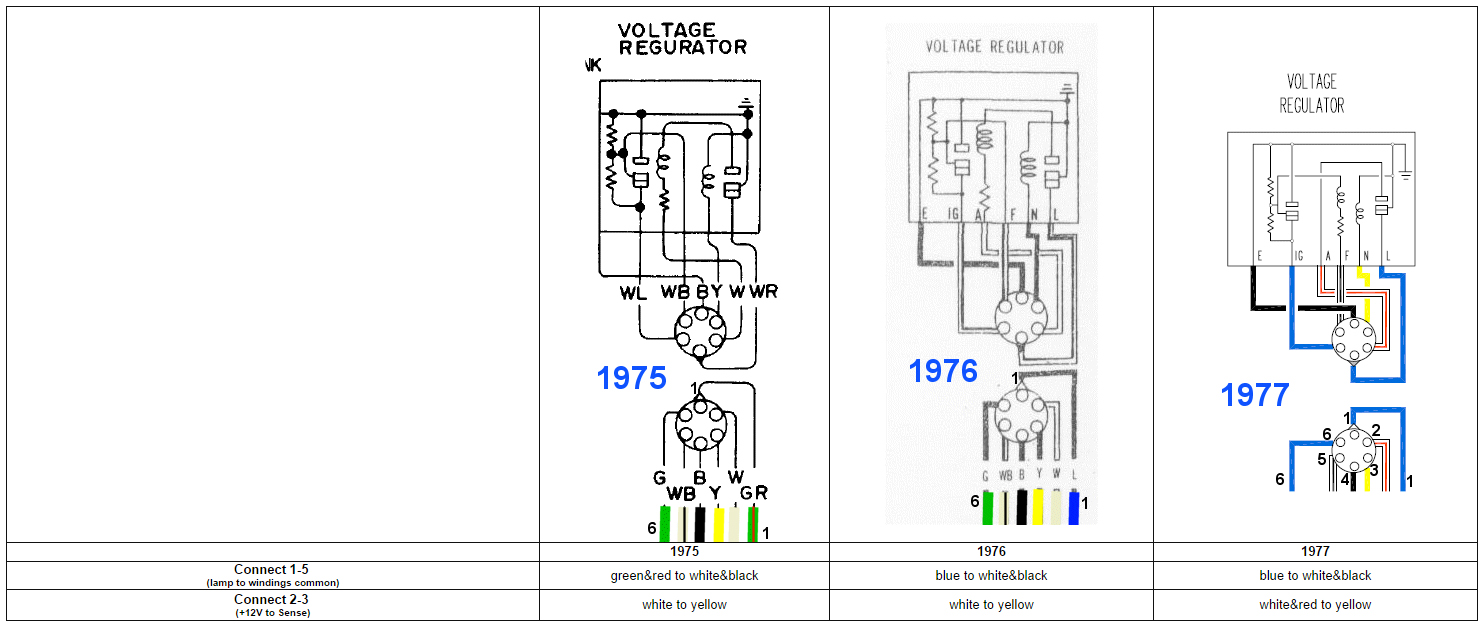
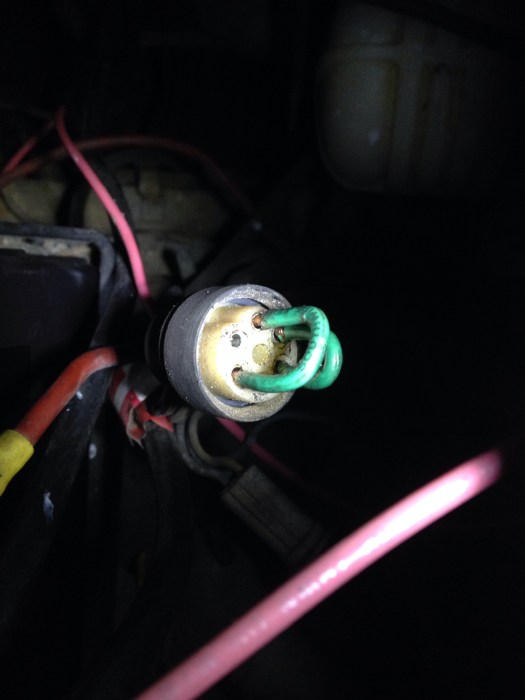
5) Depending on your year 280z, use the chart below to determine which colored wires to jump. Regardless of color, wires 1 and 5 are to be connected, as well as 2 and 3. You actually have several options: 1) cut / connect wires before the 6-pin connector; 2) jump the wires on the connector (like shown below); or 3) cut / connect wires after the connector. I choose to just jump at the connector in some rare chance I need the connector in the future (though, this IS one of those upgrades that is just necessary on a 280z). Here’s a chart from AtlanticZ.

Daily Datsun 280z alternator upgrade wiring diagram

IMG_8320.JPG

6) Reconnect the battery, check for any immediate electrical issues

7) Turn on the car to run on battery (not all the way on), and note that the charge light is lit in the volt meter dial. Turn the car on to verify the charge light turns off, and you’re registering around 14V. If the charge light is still on, and the dial is only reading 12V while the engine is running, it means something is a miss. Double check your wiring all around.

Now that your alternator is internally regulated, so there’s no more faulty regulator to replace!


IMG_8323.JPG

Yeah! all done – i believe this only took me about an hour to do. I certainly remember the sleep / peace of mind afterwards!

Helpful link from AtlanticZ: http://atlanticz.ca/zclub/techtips/alternatorswap/index.html

Review: Z Alternator Bracket by Futofab

A little while back, the 280z started to squeak and shrill again. Last time it was alternator belt, and I suspected it might be again – sure enough, it was. This time though, it wasn’t that the alternator slid by the bracket’s grease…

20131020-103056.jpg


Oooh yes, that’s broken my friends.

So naturally i thought, ‘ok, i can make one’…then, ‘how do i make this better?’
Of course someone already has, and the guys at Futofab have already made a Datsun alternator bracket (or an adjustment strut). This strut just doesn’t look sturdy and pretty (best qualities in anything), but it’s also very convenient when adjusting as the rod ends are reverse threaded. And of course once again, I thought i could definitely make that! However, save yourself the time and money, i’ve already done the research – you’ll probably pay just as much (if not more) finding a left / right threaded rod end and a reverse half-threaded 4″ long nut (McMaster-Carr don’t have any!). So go find Futofab on ebay!

Futofab Alternator adjustment strut / bracket for Datsun - Daily Datsun


Here’s what I needed:

12mm socket (bolt on bracket)
13mm socket (bolt on alternator)
adjustable wrench (for strut and nuts)

Time to take the broken one out!

Broken alternator bracket / strut - Daily Datsun


The original crossed the direct line to the alternator (hence the bend in the original), however, the Futofab version can attach directly inline without hitting the alternator blades.

20131020-103125.jpg


Installed!

20131020-103136.jpg


No more squeaks, so much more power with a confident belt driving that alternator…and no more embarrassing squeals heading out (seriously give your car so much more age!). Hats off and thanks to the guys at Futofab!


Smog saga…

Sigh – “if it ain’t one thing, it’s another…”

Heard that before? We’ll let’s take this journey of the Smog Saga story together.

Last post was about having to get the Datsun 280z smogged because it’s a 1977 (and in CA, cars 1975 and prior are smog exempt!). Lo and behold the San Jose’s Smog Tech Test Only station was finally open. I was hoping Zac, the last technician who helped me out, would’ve been there, but I guess he’s gone. So, Nguyen (first name) help me out and put the Z on the machine.

Vvrrroom… vrroom.. [small chat].. i’m nervously looking at the digital gauge nearly falling out of the green passing zone. He pokes / prods.. gets under the car.

“You don’t have a legal cat”, he says.

Doh. Seriously. So i guess i know what a bagel and oj got me last time.

He mentions that CA gov passed a law recently about catalytic converters needing a special number. I quickly clamor, “But but mine’s a ’77 and they probably didn’t have numbers back then. I swear it’s all original!”. Nope, no go. Not only that, I failed out of CO spec on the actual smog test. Not by much, but still beyond the max % allowed:

CO% levels
15mph – MAX: 1.36; AVE: 0.17; MEAS: 2.03
25mph – MAX: 1.16; AVE: 0.15; MEAS: 2.66

*AVE = Average Emissions for Passing Vehicles

So as you can see, I’m just out of the range of passing 😦 Some google searching shows this is related to a few things, but probably due to running too rich (too much fuel in the mix). After a post on ClassicZCars.com forums, rcb280z pm’d me and we had a good chat about bringing those CO% levels down. His suggestion was to also check out the spark plugs for excess carbon (ah!). He swears by NGK, and lo-and-behold, most Z drivers do!

Time to get that 280z catalytic converter changed, new spark plugs, 87 gas, and head over to Smog Tech!

oh yeah.. if it ain’t one thing..it’s:

Daily-Datsun-broken-alternator-bracket
a broken alternator bracket (that’s why my car’s been squeaking!) and…

Daily-Datsun-cracked-EGR-tube
cracked EGR tube! oy…

i need a beer.

Let it rain

This morning’s adventure started out w/ getting three simple plastic pieces installed and hopefully end with a new battery tray and un-cracked center console. Perhaps a bit too ambitious.

Inspect, Inspect, Inspect – I’ve been trying to avoid the rust issue just a little bit longer (at least until the honeymoon phase is over), but you know, you’ve just gotta face it. Luckily this machine truly hasn’t seen much aging, and is pretty rust free – i just don’t want to be surprised. I took another look at the bondo’d driver side rear quarter panel, and it looks like it was a broad dent that just popped back out – almost no crease lines from the dent, just two small holes from which they probably popped it back out. There was some quarter sized surface rust forming, but nothing to be concerned about. One thing i did notice was the brace that holds quarter panel plastic was bent – ah ha! the true nature of the dent showing itself through the remnants of the damage. As you can see, pretty bent out of shape, but nothing a little force won’t correct. Tagged the inner panel w/ rust inhibitor and even did the whole for the antenna.
20111103-100524.jpg

20111103-100533.jpg

20111103-100548.jpg

Engine Cutting Out at Idle – yep. I was going to take the 280z out to pick up the center console from whale-tail Andrew, but it wouldn’t stay idle! The car would start just fine, stay at idle for a little bit, then just slowly drop and drop, then *poof*, cut dead. This morning was no different, it wouldn’t stay at idle. After reviewing yesterday’s air-filter-to-AFM hose, and fusible links I remembered that I didn’t quite fix the squeaking belt noise. Then it hit me – engine cuts / rpms drop when gas is pressed… Engine spins the alternator, alternator converts that mechanical energy into electrical, electricity for spark plugs! Once I tightened up that alternator belt the engine stayed idle and actually ran better – huh, imagine that!

20111103-100447.jpg

20111103-100459.jpg
Ugh! – Damn, can’t wait to get that manual. For anyone putting on the 280z driver side rear quarter panel plastic get your tools out – it’s not just a pop-in job. Long trial-and-error story short, I had to take out the rear deck panels, the deck stand, the seat belt AND the seat belt fastener plate in order to push that thing in. 45min royal pain in the ass. No wonder it wasn’t put back in place! But man, so much cleaner now. Shined up the back plastic as well, and fit that into place – it’s coming together.

20111103-100619.jpg
Here’s Wild Bill! Currently running a great Datsun truck – but take a look in the back! Panasport 15×7 for only $400! They’ve seen better days, needs some new enamel, but hey, $400! And every paragraph referring to wild Bill is not without an exclaimation!
20111103-100630.jpg